 |
|
 |
Check Live Camera |
|

|
 |
August 31, 2025, 7:47 am |  |
|
|
Advertisments |
|
|
July 16, 2024
|


Hosta shoots, commonly known as "hostons" or simply the new sprouts of hosta plants, are a versatile addition to both the garden and kitchen. As the early spring brings forth these tender, leafy greens, the possibilities for their use expand beyond traditional gardening into the realm of culinary arts.
Exploring the uses of hosta shoots can open up a world of creativity and sustainability in everyday life. Whether you are a seasoned gardener, a gourmet chef, or just someone looking to try something new, this article will provide innovative and practical ways to utilize these shoots, enhancing your connection with your garden and your plate.1. Sauteed Hosta ShootsTurbocharge your springtime menu by sautéing hosta shoots with a touch of garlic and olive oil. This simple dish highlights their natural sweetness and tender texture.2. Hosta Shoots in SaladAdd raw, thinly sliced hosta shoots to your salads for an unexpected, slightly sweet crunch. They pair wonderfully with vinaigrette dressings and fresh vegetables.3. Pickled Hosta ShootsFor a tangy twist, pickle your hosta shoots. Use a mixture of vinegar, sugar, and spices to create a delightful addition to sandwiches and charcuterie boards.4. Hosta Shoots TempuraDip hosta shoots in a light tempura batter and fry them until golden. Serve with a soy dipping sauce for a delicious, crunchy appetizer.5. Blended into SmoothiesFor a nutrient boost, incorporate hosta shoots into your green smoothies. Their mild flavor blends well with fruits and other greens like spinach or kale.6. Hosta Shoots Stir FryCombine hosta shoots with other spring vegetables like asparagus and green beans for a fresh, quick stir fry. Add your choice of protein for a complete meal.7. Steamed with Butter and HerbsSteam hosta shoots until tender, then toss with butter, salt, and freshly chopped herbs. This simple preparation lets their natural flavor shine.8. Added to Soups and StewsChop hosta shoots and add them to vegetable soups and stews. They contribute body and a silky texture to light spring soups.9. Hosta Shoots QuicheIncorporate chopped hosta shoots into the egg mixture of a quiche. They add a delightful texture and mild onion-like flavor that enriches the overall dish.10. Hosta Shoots PestoCreate an innovative pesto using hosta shoots instead of the traditional basil. Blend the shoots with garlic, nuts, Parmesan cheese, and olive oil for a fresh, green sauce. |
June 26, 2024
Check out these 8+ ideas

1. Leave them on the lawn
One of the easiest things to do with your grass clippings is to mulch them as you mow (many lawnmowers have this option) and leave them right on the lawn. This practice is known as grasscycling and has many benefits for your lawn. It helps to cut down on water use and also adds extra nitrogen, reducing the need for fertilizers.
2. Fill raised beds
Building raised beds can be an expensive endeavor when it comes to filling them with soil. To help offset the cost you can use grass clippings to take up space in the bottom half of the bed. Just be careful not to fill the beds with more than 1/4 or so from grass.
3. Make a liquid plant food
Compost tea is popular among organic gardeners to feed their plants. You can make a similar liquid plant food by steeping grass clippings in water for 3-4 days and then straining out the liquid. The resulting "tea" will contain nutrients, amino acids and proteins that are a natural food for your plants.
4. Spread them as mulch
After bagging the clippings while mowing, you can spread them around the base of trees and shrubs or on the potting soil surface in container plants. Acting as a mulch, the grass clippings will help to prevent weeds while increasing soil moisture retention.
5. Add to compost pile
For your compost pile to work efficiently, it needs a mix of "brown" (high carbon) and "green" (high nitrogen) materials. Adding grass clippings to the pile will add nitrogen that's important for production of protein — a food source for the microbes doing the work. Sounds complicated, right? Home Composting Made Easy helps to lay it all out in an easy-to-understand way.
6. Feed to livestock animals
Some of your livestock can be fed grass clippings as a supplement to their diet. Rabbits, goats, chickens, cattle and sheep will benefit from the additional nitrogen boost. According to Farm Show, silage made from grass clippings has a higher protein content and digestible matter percentage than hay.
7. Use as a natural dye
While it may sound somewhat crazy, you can actually take grass clippings and use them to make a natural dye. This dye can then be used to color Easter eggs or even to dye fabrics.
8. Recycle them
Similar to cardboard, plastic and glass, your grass clippings can be recycled as well. Many municipalities or recycling centers have programs in place to dispose of your grass clippings in a green manner. Often these entities have their own compost piles and use the grass as a green source in the piles.
9. Attract wildlife to your yard
If you want to help feed the local wildlife and encourage these fascinating creatures to come to your yard so you can watch them, put your glass clippings in a pile that's easily accessible to deer and other wildlife. Just make sure you're prepared to have them munch on other flowers and garden plants too, unless preventative measures are put in place.
Stop throwing out your food scraps
Here are 10 reasons to bury them instead
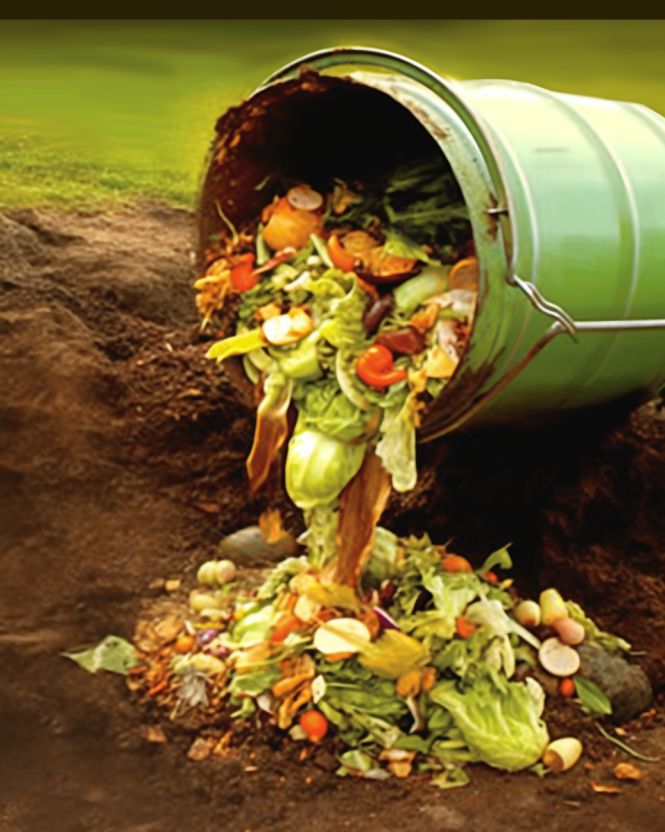
Everyone eats, and almost everyone (at least in the United States) produces a lot of food waste. When most folks clean off their plates, they are used to dumping the food scraps in the trash with very little thought. What can you do with leftover, partially chewed food, anyway?
It turns out that there are a number of things you can do with food scraps, especially when it comes to the garden.
Keep reading to learn why you might never want to throw out your food scraps again.
1. Food scraps decompose.
Food scraps such as fruit cores, banana peels, citrus peels, paper towels and even tea bags decompose once buried in the soil. The time of decomposition usually ranges between one month to a year.
2. Food scraps add nutrients to the soil.
Adding food scraps to soil helps restore organic matter as it provides the necessary means for microorganisms in the soil to thrive. This makes the soil healthier for plants.
3. Reduce waste and save money.
You can help the environment by reducing normal kitchen waste. Plus, you may save money on garbage removal costs.
4. Reduce bad odors.
Don't leave the food scraps inside your home and cause a stink. With the right composting recipe, the compost itself won't have foul smells, either.
5. It's better for dogs, too.
Feeding your dog food scraps can lead to a more unhealthy, unbalanced diet. (Just make sure you are not burying meat or milk.)
6. Food scraps help with water retention.
Food scraps in the soil provide more moisture, which helps the entire garden.
7. Easy and fast composting.
Burying food scraps is a lazy person's way of helping the environment. Simply dig a hole (around 10 to 12 inches deep), dump food scraps in and replace soil. That's it!
8. Makes neighboring plants stronger (and better-tasting).
Your neighboring plants will be happy. "Research shows that compost enhances the ability of tomatoes and other vegetables to stand up to common diseases and may improve their flavor and nutrition," states Bonnie Plants. Plus, your family will be happier that you are feeding them a more tasty, healthier meal.
9. Help keep pests at bay.
Food scraps act as a natural method of pest control. For example, garlic helps deter worms, ants and other unwanted critters. Sometimes, humans too!
10. It's free.
Burying food scraps costs you nothing. No need to buy any expensive fertilizer.
Have you ever buried food scraps?
If you know someone who loves to garden, make sure to share these tips with them on Facebook.
June 18, 2024
Here's the right way to prune tomatoes and get a massive harvest
When it comes to cultivating a thriving garden, few rewards are as satisfying as a bountiful tomato harvest. The vibrant colors, juicy textures, and delectable flavors that tomatoes bring to our culinary creations make them a staple in gardens around the world. However, achieving those massive, picture-perfect tomato harvests requires more than just luck and soil. It involves a combination of knowledge, technique, and careful attention to the needs of these versatile plants.Among the essential practices that play a pivotal role in maximizing tomato yields is pruning. While pruning might sound intimidating to some, it's a skill that, when mastered, can transform your tomato plants into vigorous, fruitful powerhouses. In this guide, we'll unravel the art of tomato pruning, exploring proven techniques that will not only lead to massive harvests but also foster healthier and more disease-resistant plants.Understand the Basics of Tomato GrowthBefore you start pruning, it's important to have a basic understanding of how tomatoes grow. Tomatoes are a vining plant that naturally produces side shoots or "suckers" at the junction between the main stem and the branches. These suckers can develop into full-fledged stems, leading to a bushier plant but potentially fewer fruits if not managed properly.Remove Suckers WiselyOne of the most important steps in tomato pruning is removing suckers. These small shoots divert energy away from fruit-bearing branches and can lead to a crowded and less productive plant. To prune suckers, simply pinch or cut them off when they are small, usually between 1 to 3 inches in length. This encourages the plant to focus its resources on developing and ripening existing fruits.Pruning suckers is a key practice to encourage optimal fruit development. Suckers divert nutrients and energy away from the main stem and existing fruit-bearing branches. By removing them, you direct the plant's resources toward fruit production, resulting in larger and better-quality tomatoes. This practice also aids in maintaining an organized and manageable plant structure.Determine Pruning StyleThere are two main approaches to tomato pruning: the single-stem (indeterminate) method and the multi-stem (determinate) method. The single-stem method involves allowing only the main stem to grow while removing all side shoots. This approach is ideal for maximizing fruit production and is commonly used for indeterminate tomato varieties. The multi-stem method involves allowing some side shoots to develop, creating a bushier plant. This is more suitable for determinate varieties, which tend to produce their fruits over a shorter period.Choose the Right ToolsTo avoid damaging your plants, it's crucial to use the right tools for pruning. A sharp pair of pruning shears or scissors will allow you to make clean cuts without tearing the plant tissue. Clean your tools before and after each use to prevent the spread of disease.Prune for Air CirculationProper air circulation is essential for preventing fungal diseases like blight. As your tomato plant grows, remove any lower leaves that touch the ground. This prevents soil-borne pathogens from splashing onto the leaves and reduces the risk of infection. Additionally, thin out the foliage by selectively removing some of the larger leaves to improve air circulation through the plant.Prune Damaged or Diseased GrowthRegularly inspect your tomato plants for signs of disease, pests, or damaged foliage. If you spot any affected areas, promptly remove them to prevent the issue from spreading.This not only helps maintain plant health but also ensures that the plant's resources are directed toward producing healthy fruits.Time Your PruningTiming plays a crucial role in tomato pruning. Start pruning once your plants have established a strong root system and have a few sets of true leaves. Suckers can be removed every 1-2 weeks throughout the growing season. However, avoid heavy pruning during periods of high stress, such as extreme heat. |
Tuesday June 04, 2024
Creating a Butterfly Garden

Creating a butterfly garden not only adds vibrant colors and movement to your outdoor space but also supports biodiversity and helps conserve various butterfly species. These beautiful insects play a critical role in pollination, making them essential to our ecosystem. Moreover, a butterfly garden can be a delightful and educational experience for the entire family, providing hours of enjoyment and a closer connection to nature.
This article will guide you through the process of starting your own butterfly garden with ease. By following the simple steps provided, you'll transform your garden into a haven for these graceful creatures. Read on to discover how to create an enchanting space that will attract and support butterflies, ensuring they frequent your garden throughout the seasons.
Select the Right Location
1. Choose a sunny spot:
Butterflies are ectothermic creatures, meaning they rely on external sources of heat to regulate their body temperature. A garden with plenty of sunlight will ensure that butterflies have the warmth they need to thrive.
2. Shelter from wind:
Strong winds can deter butterflies from visiting your garden. Opt for a location that provides natural windbreaks, such as shrubs, trees, or fences.
Choose the Best Plants
1. Native plants:
Select plants that are native to your region. These plants will be well adapted to your local climate and will provide the right food sources for local butterfly species.
2. Nectar-rich flowers: Plant a variety of nectar-rich flowers that bloom at different times throughout the year. This will ensure a consistent food supply for butterflies.
3. Host plants for caterpillars:
Butterflies lay their eggs on specific plants that serve as food for their caterpillars. Include host plants such as milkweed, parsley, and dill to support the entire life cycle of butterflies.
Provide Water Sources
1. Create puddles:
Butterflies need water to drink and to extract minerals. Create small, shallow puddles in your garden where butterflies can easily access water.
2. Install a birdbath:
A shallow birdbath with flat stones or marbles can serve as a water source. Ensure the water is clean and fresh, and frequently replace it to prevent bacteria build-up.
Add Butterfly-Friendly Features
1. Sunbathing spots:
Place flat stones or similar objects around your garden to provide butterflies with sunbathing spots. This will help them regulate their body temperature.
2. Avoid pesticides:
Chemical pesticides can harm butterflies and other beneficial insects. Opt for organic or natural pest control methods to protect your butterfly garden.
ADVERTISEMENT
By following these simple steps, you can create a beautiful and thriving butterfly garden that will attract these enchanting creatures year-round. Enjoy the vibrant colors and delicate dances of butterflies as you support their crucial role in our ecosystem.
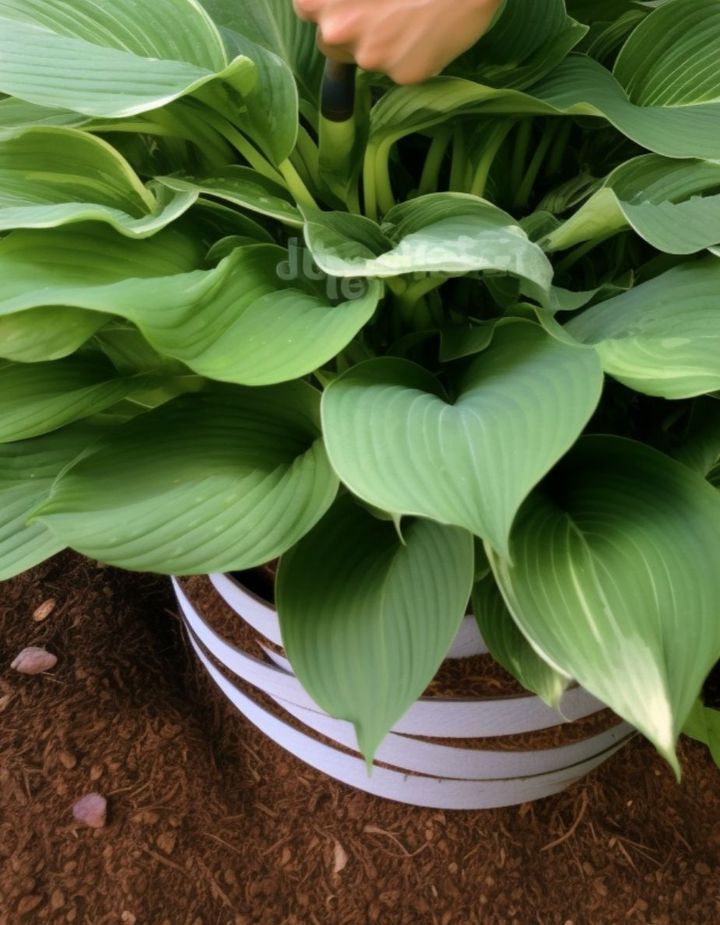
Before planting hostas, it's important to check out these tips:
1. Best to plant in spring or late summer
Hostas can be planted any time the ground is workable, but they do best when planted in the spring or late summer after the hottest part of the season has passed. This will allow root systems to become established before the hottest part of the growing season, or before the plants go dormant in the fall.
2. Prefer moist soil
Plants like soil that will hold water well, without being overly damp. Their shallower root systems can't access water held deeply in the soil. Mulch your garden beds to help retain soil moisture.
3. Need a fairly large space
While the plants may grow fairly wide, their root systems will extend outward in the soil almost to the edge of the leaves. Plan on giving each plant approximately 2-3 feet of space to allow it to have adequate room for root growth.
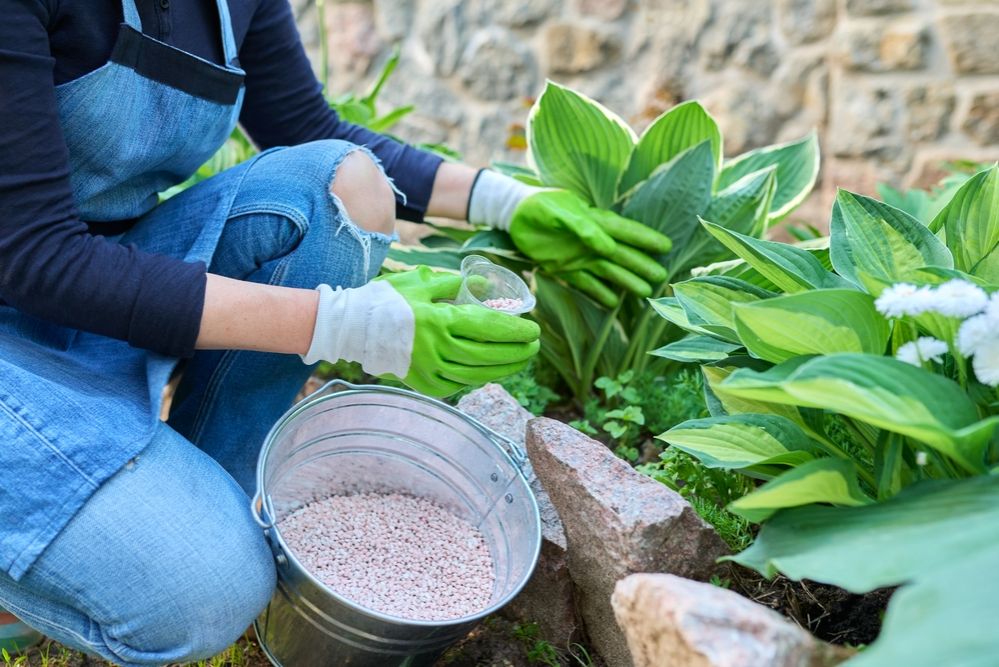
4. Add organic matter to hole
When preparing planting holes, make sure you dig holes that are wider than they are deep. Then add a generous helping of finished compost or other organic matter to the bottom of the hole, working it into the soil. This will help to improve the soil structure, increase water retention, and provide nutrients to the plant over time.
5. Soak bare root stock before planting
If you're planting bare root stock in the spring, soak plants in water a couple of hours prior to planting. Remember, bare root planting is quite short and you can easily miss it if you aren't on top of your calendar.
6. Mulch cautiously
It's important to mulch around plants to help soil moisture retention, but you don't want to mulch directly up to the stem of the plant. This encourages fungal problems and other diseases, as well as voles if mulch is applied too thickly.
Wednesday May 29, 2024
Most people know about figs, but they don't realize how important fig leaves are.

Figs are a delicious and ancient fruit, enjoyed by many people around the world. However, not as many people are aware of the significant benefits and uses of fig leaves.These often-overlooked parts of the fig tree hold a plethora of advantages for health, cuisine, and more.If you think you've uncovered everything there is to know about figs, think again!This article delves into the untapped potential of fig leaves and explains why they deserve more recognition.You won't want to miss out on learning how this remarkable leaf can enhance various aspects of your life.Health Benefits of Fig Leaves1. Diabetes Management:Fig leaves have been shown to reduce the amount of insulin needed by diabetic patients.2. Lowers Triglycerides:Consuming fig leaf extract can help lower triglyceride levels in the body, contributing to better heart health.3. Anti-Tumor Properties:Some studies suggest that fig leaves may have potential anti-tumor effects, although more research is needed.Culinary Uses1. Fig Leaf Tea: You can brew fig leaves to make a refreshing and health-boosting tea laden with beneficial compounds.2. Culinary Wraps: Like grape leaves, fig leaves can be used to wrap foods, infusing them with a delicate, nutty flavor.3. Flavor Enhancer: When dried and ground, fig leaves can be used as a spice to add a unique flavor to your cooking.Other Uses1. Natural Insect Repellent: Fig leaves can be an effective natural insect repellent, helping to keep pesky bugs at bay.2. Skin Treatment: Compounds in fig leaves may help in the treatment of certain skin conditions like warts and eczema.3. Eco-Friendly Alternative: Fig leaves can be used in a variety of DIY projects, from homemade paper to sustainable packaging solutions.So, the next time you come across a fig tree, remember that the leaves are just as important and beneficial as the fruit itself. Whether for health, culinary innovation, or other practical uses, fig leaves offer a world of untapped potential waiting to be discovered. Don't miss out on making the most of this remarkable natural resource.
If you have found this article interesting follow this link to learn more about the health benefits of fig leaves(click here) |
May 21, 2024
9 tips from experienced gardeners on how to make your hostas thrive
Hostas are a lovely plant for most gardens. They're pretty low maintenance, and this large, full plant is a lush complement. There are more than 2,500 varieties of hosta, so gardeners have several options.
It's hard to believe that a bare root hosta can grow to be six feet wide. Whether you are a newbie or seasonsed hosta gardener, here are 9+ pro tips for working hostas into your landscape or garden:
1. Shade matters
Hostas are notorious for being shade tolerant, but some varieties need a little more light. Try looking at the leaves. Darker leaves need moderate shade and lighter leaves fair well in brighter sun, but make sure all receive at least some shade.
2. Leave the dead foliage alone
When the plants die in the winter, leave the dead foliage alone. Add some leaves on top to provide a little insulation. The foliage will let you see where the plants are and prevent accidental trampling of the new growth in the spring.
3. Protect the shoots
Keep deer away from your hosta sprouts by planting daffodils around the shoots. Protect the plant from slugs by dusting the ground around the shoots with sand.
4. Use a belt to move the plant
If you need to relocate your hosta plant, pull the leaves together and secure a belt around the stems to keep them from breaking while you transplant. .
5. Revive your plant
If your hosta takes a turn for the worse, you may be able to save it. Pull the damaged plant from the ground, salvage what you can and plant it in a jar of water until the roots are ready to be replanted.
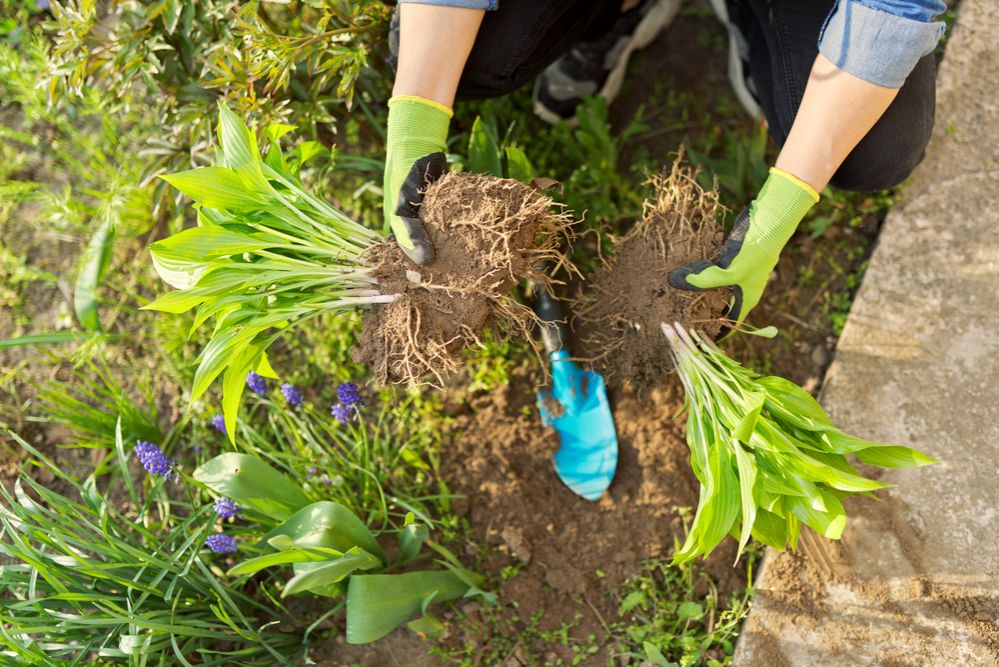
6. Divide the plants to make them fuller
This is a case of what doesn't kill you makes you stronger. Dividing hostas can give you more plants. It takes a few weeks to get them established if you tackle them in the summer, but it gives you time to fully prepare them to get settled for the winter and next spring.
7. Clean around the plant
When the fall weather settles in, it's time to clean up the flower bed to prevent rot and other pests. Some gardeners prefer removing the foliage, while others (see tip No. 2 — just let it be). Either way, now is a good time to remove anything around the plant that could cause rotting or disease.
8. Use mulch
If you live in a hot, dry climate and/or have sandier soil, add mulch around your plants to ensure they don't dry out too quickly.
9. Be patient
It takes an average of three years for a hosta to become established. If you want a bigger plant faster, don't buy a starter plant from a nursery. Ask a friend to give you a division from their plant instead.
Beginning gardeners will love that this plant is sturdy and can provide plenty of leaves and coverage. Try a few of these ideas to ensure you get the best plant possible.
May 14, 2024
Plant these 12 plants once and have them self-seed all over your yard
Creating a vibrant and low-maintenance garden is a goal that many gardening enthusiasts aspire to achieve. The concept of self-seeding plants has gained immense popularity among gardeners due to its ability to provide a continuous supply of beautiful blooms and foliage without constant intervention. Imagine planting a few seeds or seedlings and watching as your garden becomes a tapestry of colors and textures, with new plants popping up year after year. This phenomenon is the magic of self-seeding plants, a boon for both seasoned gardeners and those just beginning their gardening journey.
Understanding Self-Seeding Plants:
Self-seeding plants, also known as self-sowers or volunteers, are plants that produce seeds that naturally fall to the ground and germinate without the need for human intervention. These plants have evolved mechanisms to scatter their seeds, ensuring the survival of the species. This process closely mimics the natural cycle of plants in the wild, where seeds are dispersed by wind, water, or animals, allowing them to establish new growth in favorable conditions.
Pros of Self-Seeding Plants:
Embracing self-seeding plants in your garden comes with a plethora of benefits that contribute to a flourishing and dynamic landscape:
Low Maintenance: One of the most significant advantages of self-seeding plants is their low maintenance nature. Once they are established, they require minimal care. Since they are adapted to your local climate and soil conditions, they often thrive without the need for excessive watering, fertilization, or pest control.
Cost-Effective: Self-seeding plants provide excellent value for your gardening investment. A single initial planting can yield numerous generations of plants, eliminating the need to buy new seeds or seedlings each year.
Natural Beauty: Self-seeding plants lend an air of authenticity and natural beauty to your garden. They give a sense of wildness and serenity, creating a more relaxed and informal atmosphere.
Adaptation to Conditions: These plants tend to be well-suited to the specific conditions of your garden, as they have adapted over time to your climate, soil, and other environmental factors. This often makes them hardier and more resilient than exotic species.
Continuous Blooms: Self-seeding plants often have extended blooming periods, ensuring that your garden remains colorful and lively throughout the growing season. As one set of plants completes its lifecycle, new plants emerge to take their place.
Garden Evolution: The dynamic nature of self-seeding plants means that your garden is constantly evolving. New combinations of plants and unexpected arrangements can create a unique and ever-changing visual experience.
Top Self-Seeding Plants:
While many plants have the ability to self-seed, some are particularly renowned for their success in this regard. Here are a few popular self-seeding plants to consider for your garden:
Nigella (Love-in-a-Mist): Delicate blue or white flowers surrounded by feathery foliage create a charming and ethereal look.
Hardiness Zone: 2-10
Sunlight: Full sun to partial shade
California Poppies: Vibrant orange, yellow, or red blooms that thrive in sunny and dry conditions, adding a burst of color to your garden.
Hardiness Zone: 6-10
Sunlight: Full sun
Cosmos: With their daisy-like flowers in various shades of pink, white, and purple, Cosmos attracts pollinators and adds an airy elegance to the garden.
Hardiness Zone: 2-11
Sunlight: Full sun
Cleome (Spider Flower): Tall spikes of unique spidery blooms in shades of pink, white, or lavender create a striking vertical element.
Hardiness Zone: 2-11
Sunlight: Full sun to partial shade
Larkspur: Tall spires of colorful flowers in shades of blue, purple, pink, and white, perfect for adding height and vertical interest.
Hardiness Zone: 2-9
Sunlight: Full sun
Forget-Me-Nots: Small, delicate blue flowers that form a carpet of color, often used for shaded areas and woodland gardens.
Hardiness Zone: 3-8
Sunlight: Part shade to full shade
Borage: Bright blue, star-shaped flowers and edible leaves that attract pollinators while adding a touch of flavor to salads.
Hardiness Zone: 2-11
Sunlight: Full sun to partial shade
Sweet Alyssum: Fragrant white, pink, or purple flowers that form low mounds, suitable for borders, containers, and hanging baskets.
Hardiness Zone: 4-9
Sunlight: Full sun to partial shade
Poppies: Various types of poppies, such as Oriental poppies or Shirley poppies, produce eye-catching blooms in a range of colors.
Hardiness Zone: Varies by type (e.g., Oriental poppies are often Zone 3-8)
Sunlight: Full sun
Black-Eyed Susan: Bright yellow flowers with dark centers that attract butterflies and other pollinators.
Hardiness Zone: 3-9
Sunlight: Full sun to light shade
Verbena bonariensis: Tall, slender stems topped with clusters of small purple flowers that create a whimsical and see-through effect.
Hardiness Zone: 7-11 (often grown as an annual in colder zones)
Sunlight: Full sun
Hollyhocks: Towering spikes of flowers in a variety of colors that add a cottage garden charm to any landscape.
Hardiness Zone: 3-9
Sunlight: Full sun to light shade
May 09, 2024
I swear by this trick to getting rid of all the flies, mosquitoes, and bugs
Dealing with flies and mosquitoes can be a persistent nuisance, especially during warmer months when these pests are most active. Many commercial insect traps and repellents contain harsh chemicals that can be harmful to the environment and potentially hazardous to children and pets.For those seeking a more natural and safe solution, DIY traps using everyday household items can be an effective alternative. Not only are these homemade traps easy to assemble, but they also utilize non-toxic ingredients that are commonly found in any pantry. This article introduces a simple DIY recipe for creating an effective fly and mosquito trap using just 3 household ingredients.Materials1 cup of vinegar
|
April 23, 2024
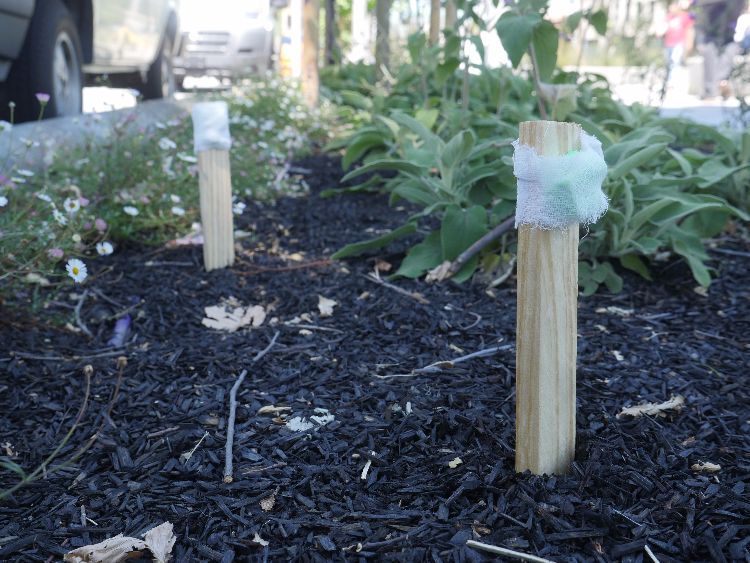
Tips for using Irish Spring to deter garden pests
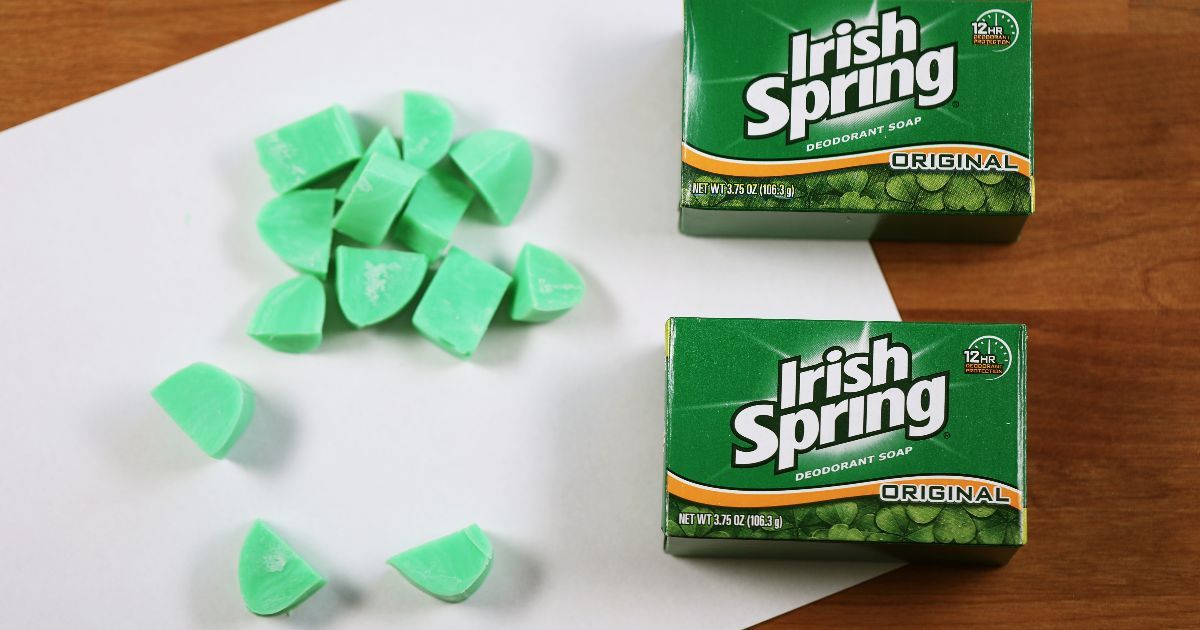
Watching deer graze in a field or rabbits bouncing through the grass can be a peaceful experience. Watching them graze in your garden, not so much. While these charming creatures mean no harm, they can leave your veggies and plants nibbled and damaged.Try checking your leaves. Bugs will leave jagged edges and half-eaten leaves. Rabbits and deer will leave a clean cut or eat the entire foliage. You can keep your plants and veggies safe from the friendly herbivores without expensive chemicals or dangerous traps by using something you may already have on hand: Irish Spring Soap!The soap only works on pests like mice, rabbits, and deer (you'll have to address insect problems another way). While it isn't going to completely eliminate your problem, this simple remedy should keep most visitors at bay.1. First, slice up Irish Spring soap into 1/2-inch cubes. (The amount of soap and number of wooden stakes you need for this project will depend on the size of your garden.)2. Next, place two pieces of the soap into a drawstring pouch, and knot it closed. Alternatively, you can wrap it in some cheesecloth.3. Secure your soap bag to a wooden stake via a staple or hot glue gun, and drive the stake into the ground about 5 to 10 feet apart, around your garden.If you don't want to nail stakes into the ground, you can lay the pouches under vegetation.Deer, in particular, are put off by the scent of animal fats in the soap. If you can't get Irish Spring, try any scented soap made with tallow, which is derived from animal fat. Additional research by the University of Vermont Extension, suggests that soaps containing coconut oil can attract deer (so check your ingredients!) |
April 16, 2024
Stop buying tomatoes
Use these 4 smart methods to grow an endless supply
1. Bury tomato slices
You read that right. This method is cheap and easy. All you need is some potting soil, an overripe tomato, and a few pots.
Fill a large pot most of the way full with potting soil. Then add a few tomato slices (about 1/4 inch thick) on top. Make sure the slices you choose have plenty of seeds and cover them with just enough soil to bury them. Wait a week or two for them to sprout.
After about a week, your tomato seeds will start to sprout. You may get as many as 60 seedling sprouts in one pot! Look for about four or five of the biggest (strongest sprouts). Remove those sprouts and replant them in another pot.
Watch the new plants for a few weeks. You'll likely notice that one or two of the plants seem to be growing bigger and stronger. Remove the other two plants to give your stronger plants more room to grow.
2. Plant them in the ground
If you have a lot of yard space with plenty of sunlight, simply burying your tomato plant in the ground, instead of a pot, can produce a much higher yield. An added benefit of this method is that it requires less watering. If you opt to go this route, just remember that deer and rabbits really love noshing on these types of gardens, so you'll need to keep your plants safe.
3. Grow them in a window box
If you live in a small space or just don't have a large yard, you can still grow tomato plants by planting them in a window box. You'll need to choose larger window boxes that can hold at least 1.5 gallons of dirt. You can use string trellis drilled into the wall to stabilize the plant. Choose smaller tomato types for this method.
4. Grow them in a hanging basket
Worried about dangling a heavy box over your windowsill? Try a hanging basket on the porch instead. The downside to this method is that this plant needs more water than normal container planting because the water drains faster. Try a cascading cherry tomato for this type of planting to get best results.
Bury a raw egg in a planter and here's the effect on your garden
1. Banana skins
Bananas contain a number of nutrients including potassium, phosphate, sulfur, calcium, magnesium and sodium. All of these things can help promote healthy growing for plants. The best way to effectively use banana peels is to cut them up into small pieces so that they can decompose faster. This will result in organic matter that helps establish rich soil
2. Ash
If you have a fireplace, you'll love this free method for raising pH levels. You simply scatter the ash around the soil as a way to lower acidic levels. This will make it easier to grow a fresh crop.
3. Leaves
Allowing leaves to rot over a garden during winter will provide nutrients for the soil to prepare it for the next growing season. The leaves work to pull the organic matter back down into the soil making it dark and rich.
4. Epsom salt
Epsom salts are especially good for soil. Low pH levels are usually an indication of a magnesium imbalance. To boost pH levels in the soil, dilute Epsom salt with water and spray on the plants. The vegetation will soak up the welcomed nutrients.
5. Raw egg
The solution for a thriving plant may be as simple as planting a raw egg. As you prepare your pots with soil, simply include a single raw egg at the bottom. Over time, the egg will decompose and works as a natural fertilizer for the seedlings.
6. Use compost regularly
While using bits and pieces of natural matter can be helpful, combining many pieces of compost will only go one step further toward enriching your soil. There are a number of benefits of using natural compost regularly. It works to improve the soil structure while using less water and warding off common plant diseases. The soil benefits from added layers of nutrients, especially before a growing season.
7. Make a small compost
Interested in making your own compact compost? It's much easier than you may think! The indoor compost method is great for people who don't have a lot of yard space. The way to do it is easy. You'll need a container that is big enough to hold about three weeks worth of waste, a stirring stick ,and soil. You should start by grinding up the waste in a mixer and then drain it of excess water. Put in the container and cover with soil. Stir. After a couple of weeks, stop adding waste and start a new container in the same way. In two weeks the compost will begin to look more like soil. With two containers going, you'll always be in full supply of fresh compost to add to your plants. Of course, the bins don't have to be kept indoors.
April 02, 2024
7 brilliant tomato growing hacks
Prune Your Tomato Plants for Better Air Circulation and Sunlight
Proper pruning is key to healthy tomato plants. By removing excess leaves and stems, you can improve air circulation and sunlight exposure for your plants, thereby reducing the risk of diseases such as blight and powdery mildew. Prune your tomato plants by removing the lower leaves that touch the ground, as well as any yellowing or diseased leaves. Be sure to use clean, sharp pruning shears and make clean cuts to avoid injuring the plant.
Use Eggshells to Boost Calcium Levels in the Soil
Calcium is an essential nutrient for tomato plants, helping to strengthen cell walls and prevent a common condition known as blossom-end rot. One easy and cost-effective way to add calcium to your soil is by using crushed eggshells. Simply collect and rinse eggshells, then crush them into small pieces and scatter them around the base of your tomato plants. The calcium in the eggshells will gradually leach into the soil, providing your plants with the nutrients they need to thrive.
Plant Marigolds Near Your Tomato Plants to Repel Pests
Marigolds are not only beautiful, but they also have natural pest-repelling properties. Planting marigolds near your tomato plants can help deter common pests such as aphids, whiteflies, and tomato hornworms. The strong scent of marigolds is believed to mask the aroma of tomato plants, making it harder for pests to locate them. Additionally, marigolds attract beneficial insects like ladybugs that prey on harmful pests.
Use Epsom Salt to Enhance Tomato Flavor and Growth
Epsom salt, which is rich in magnesium sulfate, can benefit tomato plants in several ways. Magnesium is essential for photosynthesis and helps plants produce sweeter, tastier fruits. To use Epsom salt in your tomato garden, dissolve one tablespoon of Epsom salt in a gallon of water and use it to water your plants every two weeks. The added magnesium will promote stronger root systems, greener leaves, and tastier tomatoes.
Create a DIY Tomato Trellis for Vertical Growth
Providing support for your tomato plants is crucial for preventing the stems from breaking under the weight of heavy fruit. A DIY tomato trellis is an affordable and effective way to encourage vertical growth and keep your tomatoes off the ground, reducing the risk of rot and disease. Use sturdy stakes, bamboo poles, or PVC pipes to create a simple trellis structure, and tie the tomato stems to the support as they grow.
Use Coffee Grounds as a Natural Fertilizer
Used coffee grounds are a rich source of nitrogen, which is essential for plant growth. Sprinkling used coffee grounds around the base of your tomato plants can provide a slow-release source of nitrogen, improving the health and productivity of your plants. Additionally, coffee grounds help improve soil structure and water retention, making them a valuable addition to your garden. Before applying coffee grounds to your soil, be sure to let them dry and cool. Then, simply spread a thin layer of the grounds around the base of each tomato plant, and gently work them into the top layer of soil. The added nitrogen will boost foliage growth and contribute to a more robust and bountiful harvest.
Implement Companion Planting for a Healthier Garden
Companion planting is the practice of growing different plants together for mutual benefit. Certain plants, when grown in close proximity to tomatoes, can enhance their growth, flavor, and pest resistance. For example, planting basil alongside tomatoes is said to improve the flavor of the tomatoes while also repelling pests like flies and mosquitoes. Other good companion plants for tomatoes include garlic, which deters spider mites, and borage, which attracts beneficial insects like bees and repels tomato hornworms. By carefully selecting and positioning companion plants in your tomato garden, you can create a thriving ecosystem that supports the overall health and productivity of your plants
There are actually things you can do with your grass clippings.
Check out these 8+ ideas

1. Leave them on the lawn
One of the easiest things to do with your grass clippings is to mulch them as you mow (many lawnmowers have this option) and leave them right on the lawn. This practice is known as grasscycling and has many benefits for your lawn. It helps to cut down on water use and also adds extra nitrogen, reducing the need for fertilizers.
2. Fill raised beds
Building raised beds can be an expensive endeavor when it comes to filling them with soil. To help offset the cost you can use grass clippings to take up space in the bottom half of the bed. Just be careful not to fill the beds with more than 1/4 or so from grass.
3. Make a liquid plant food
Compost tea is popular among organic gardeners to feed their plants. You can make a similar liquid plant food by steeping grass clippings in water for 3-4 days and then straining out the liquid. The resulting "tea" will contain nutrients, amino acids and proteins that are a natural food for your plants.
4. Spread them as mulch
After bagging the clippings while mowing, you can spread them around the base of trees and shrubs or on the potting soil surface in container plants. Acting as a mulch, the grass clippings will help to prevent weeds while increasing soil moisture retention.
5. Add to compost pile
For your compost pile to work efficiently, it needs a mix of "brown" (high carbon) and "green" (high nitrogen) materials. Adding grass clippings to the pile will add nitrogen that's important for production of protein — a food source for the microbes doing the work. Sounds complicated, right? Home Composting Made Easy helps to lay it all out in an easy-to-understand way.
6. Feed to livestock animals
Some of your livestock can be fed grass clippings as a supplement to their diet. Rabbits, goats, chickens, cattle and sheep will benefit from the additional nitrogen boost. According to Farm Show, silage made from grass clippings has a higher protein content and digestible matter percentage than hay.
7. Use as a natural dye
SHUTTERSTOCK
While it may sound somewhat crazy, you can actually take grass clippings and use them to make a natural dye. This dye can then be used to color Easter eggs or even to dye fabrics.
8. Recycle them
Similar to cardboard, plastic and glass, your grass clippings can be recycled as well. Many municipalities or recycling centers have programs in place to dispose of your grass clippings in a green manner. Often these entities have their own compost piles and use the grass as a green source in the piles.
9. Attract wildlife to your yard
If you want to help feed the local wildlife and encourage these fascinating creatures to come to your yard so you can watch them, put your glass clippings in a pile that's easily accessible to deer and other wildlife. Just make sure you're prepared to have them munch on other flowers and garden plants too, unless preventative measures are put in place.

March 27, 2024
Plant a rose in a tomato slice & get this stunning effect in your garden
 In the pursuit of a charming and productive garden, gardeners are always on the lookout for innovative methods to enhance plant health and vitality. One such quirky technique involves planting a rose cutting in a tomato slice. While this may sound like an unconventional approach to gardening, it incorporates basic principles of plant biology and can have some interesting effects on rose propagation.Roses, being hardy and versatile, can be propagated in a variety of ways, but the tomato slice method is especially intriguing due to the nutrient boost it provides. Tomatoes are rich in essential nutrients and moisture, creating a nurturing environment for a young rose cutting to establish roots.The Tomato Slice Propagation Method Explained1. To begin, select a ripe tomato and a healthy rose cutting. The rose cutting should be about 6-8 inches in length, taken from a vigorous, new growth of your rose plant that has bloomed recently.2. Cut the tomato into slices, approximately 1/2 inch thick.3. Make a small cut in the bottom of the rose cutting, which is called a "heel". This increases the surface area from which roots can potentially grow.4. Insert the bottom end of the rose cutting directly into the center of a tomato slice, ensuring that the cut end of the cutting makes good contact with the tomato flesh.5. Prepare a pot with a mixture of potting soil and compost. You can also add some rooting hormone to the soil mixture to encourage root development. Place the tomato slice with the rose cutting on top of the soil.6. Cover the cutting and the tomato slice with a thin layer of soil. Water thoroughly but gently, taking care not to displace the cutting or the slice.7. Place the pot in a location that receives indirect sunlight and maintains a consistent temperature. You can cover the pot with a plastic bag to create a mini-greenhouse effect, which helps retain moisture and warmth.Benefits of Using a Tomato Slice for Rose PropagationUsing a tomato slice to propagate roses may offer several benefits:1. Nutrient SupplyTomatoes are full of essential nutrients that roses can benefit from. As the tomato slice decomposes, it releases calcium, potassium, and other nutrients that can be absorbed by the growing rose cutting.2. Natural Moisture ReservoirThe succulent nature of tomato slices provides a moist environment which is crucial for rooting. This eliminates the need for frequent watering, decreasing the chance of the cutting drying out.3. Rooting BoostTomatoes contain natural growth-stimulating substances that might aid in faster root development, as it does for tomato seeds.The Expected OutcomeThe above method combines the nutrient-dense and moist properties of tomatoes with the robust nature of roses. If successful, this technique results in a rose that establishes a healthy root system quickly. The young rose is then able to take full advantage of the transitional period between the slice decomposing and the cutting taking root, optimizing growth. However, results can vary based on the variety of rose, the condition of the cutting, and the growing conditions. |
Plant asparagus once and harvest for decades with these 9 tips
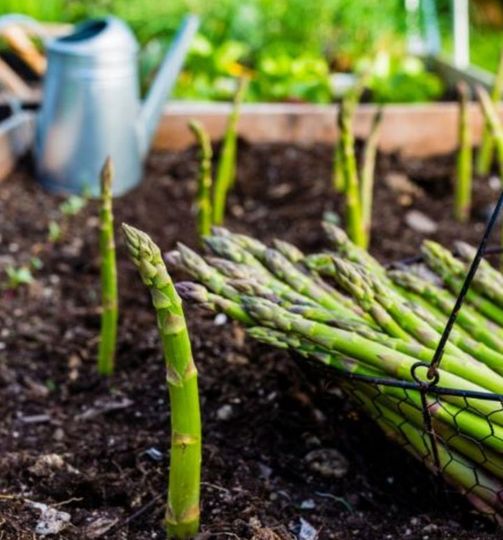
Most BC climates are suitable for growing this delicious and healthy vegetable, so if you follow the right instruction, you could be enjoying a steady source of asparagus soon.1. Choose your locationIf you choose to grow your plant from seed, you'll need to begin indoors. It's best to do this between February and May. You'll want a room with lots of natural light, between 70 and 85 degrees.2. Soak and plantIt can be hugely beneficial to soak your seeds in water for a couple of hours before planting. You can then plant your seeds at 3 per 3.5-inch pot in sterile soil, covering the top with sand.3. Pot placementYou should ensure your asparagus pots are all equipped with drainage holes. You can stand your pots in a tray or pan and water from below to avoid waterlogging. You may also want to consider a heating pad to keep your seedling warm.4. Time to transplantAfter three months of indoor growth, your seedlings should be ready to be moved outside. Check the weather that there is no risk of frost, then place your seedling outside at about 18 inches apart, and in rows that are 4 inches apart.5. The waiting gameYou should lightly cover your seedlings with soil, then water them a little once per week. Allow them to grow all summer, then trim back in fall. After three years of repeating this process, you can harvest your homegrown asparagus!6. Consider crownsSHUTTERSTOCKIf three years is too long for you to wait, you can purchase asparagus crowns ready for planting. Do some research to find the asparagus variety best suited to your location, and make sure your beds are ready.7. Prep the bedsChoose well-draining soil with a neutral pH for your asparagus crowns. Dig 12-inch troughs in your beds, then create little cones of loose dirt at the bottom of each furrow, at least 18 inches apart. Each asparagus crown can be placed on top of these dirt cones, with the roots danging down into the trough.8. Take careKeep your asparagus crowns well-watered, and add soil around them as they grow. You should also weed the beds frequently. After two years of growth, your asparagus should be ready to eat.9. Harvesting tipsYou should only harvest for around four weeks in the first year but can go for longer in subsequent years. You'll know the shoots are ready to cut when they're 8 inches tall. Use a clean, sharp knife to cut. |

Last July, the iconic monarch butterfly joined the growing list of endangered species in North America. 

The main cause of their steep decline is the scarcity of milkweed, their caterpillar's host plant and exclusive food source. Together, we can reverse this course. Together, we can plant milkweed seeds and give monarchs a much needed breather.
You can order seeds now from our partner Lasclay (a great company by the way) on the link below and get an exclusive 30% discount code with the following code: MONARCH30 (4 or more seed packets).
It's a small but powerful gesture, and it makes a great gift for your loved ones as well!
Monarchs will surely thank you for it by visiting your garden, maybe even this Summer! 
March 26, 2024
7 Easy Ways to Propagate Hostas Without Breaking Your Back
In the following guide, we talk about easy ways to propagate hostas.
Whether you're an experienced gardener or a beginner looking to expand your hosta collection, these methods will allow you to enjoy a thriving hosta garden without the back-breaking labor. By following these tips, you'll be able to enhance your garden's beauty while minimizing physical strain, allowing you to cultivate an impressive hosta display with ease and enjoyment.
1) Division
Hostas can be easily divided in the spring or fall. Simply dig up the plant and divide the clump into smaller pieces. Each piece should have at least one leaf and one root. Plant the divisions in the same area or in a different part of your garden.
2) Offsets
Hostas will produce offsets or “baby” plants around the base of the main plant. These can be carefully dug up and transplanted to a new location. Make sure to dig up the entire root system and replant it in a hole that is twice as wide and deep as the root ball. Water the new plant well and keep it moist until it is established.
3) Leaf Cuttings
Hostas can also be propagated from leaf cuttings. Cut a healthy leaf from the parent plant and remove the bottom third of the leaf. Dip the cut end in rooting hormone and plant it in a pot filled with a moist, well-draining potting mix. Place the pot in a shady location and keep the soil moist. The leaf should produce a new plant in a few weeks.
4) Stem Cuttings
Stem cuttings can also be taken from hostas. Cut a stem that has at least two leaves on it and remove the bottom leaves. Dip the cut end in rooting hormone and plant it in a pot filled with a moist, well-draining potting mix. Place the pot in a shady location and keep the soil moist. The stem should produce a new plant in a few weeks.
5) Layering
Hostas can also be propagated by layering. Choose a healthy stem and bend it to the ground. Cover the stem with soil and anchor it in place with a rock or stake. Water the area and keep it moist. The stem should produce roots in a few weeks. Once the roots are established, the stem can be cut from the parent plant and transplanted to a new location.
6) Seed
Hostas can be propagated from seed, but it is a slow process. Collect the seeds from the parent plant in the fall and sow them in a pot filled with a moist, well-draining potting mix. Place the pot in a shady location and keep the soil moist. The seeds should germinate in a few weeks.
Soap water is a gardener's defense.
Here's why.

1. Soap Water as an Insecticide
Insects can be pesky visitors in your garden, especially aphids, whiteflies, and spider mites. They can cause widespread damage and potentially ruin your crops. Soap water is a gentle but powerful insecticide that can help control these pests. The soap disrupts the insects' cell membranes, leading to dehydration and death.
2. Fungal Diseases Prevention
Fungal diseases like powdery mildew and black spot are common in gardens with high humidity. Soap water can inhibit the growth of these fungi by creating an unfavourable environment on the leaf surface. Regular spraying as a preventative measure can help keep fungal pathogens at bay.
3. Eco-friendly and Non-toxic
Many gardeners strive to maintain an organic garden, avoiding chemicals that can harm the environment or end up in their food. Soap water is a safe alternative to harsh chemical pesticides. It is non-toxic to humans and animals, and when used correctly, it does not harm the beneficial insects that your garden needs to thrive.
4. Cost-Effective Solution
Instead of spending money on expensive commercial products, gardeners can create a soap water solution using items they likely already have at home. A simple mixture of water and liquid soap (preferably biodegradable and without fragrances or additives) can serve multiple purposes in the garden, making it a cost-effective tool.
5. Easy to Make and Use
Creating a soap water solution is straightforward and only requires a few steps. Here's a basic recipe:
1. Fill a spray bottle with water.
2. Add a few drops of liquid soap.
3. Shake well to combine.
4. Test the solution on a small area of the plant before a full application.
5. Spray on affected plants, making sure to cover the undersides of leaves where insects often hide.
6. Supports Plant Health
Beyond its insecticidal and fungicidal properties, soap water can help to remove dirt and sooty mold from plant leaves, enhancing photosynthesis and overall plant health. When plant leaves can fully absorb sunlight, they perform better, leading to a more robust and productive garden.
7. Compatibility with Integrated Pest Management (IPM)
For those practicing Integrated Pest Management, which involves combining biological, cultural, physical, and chemical tools to manage pests in an ecologically and economically sound manner, soap water fits right in. It's a viable option that can be integrated with other IPM strategies to reduce pest populations without causing undue harm to the ecosystem.
March 19, 2024
Never Buy Strawberries Again
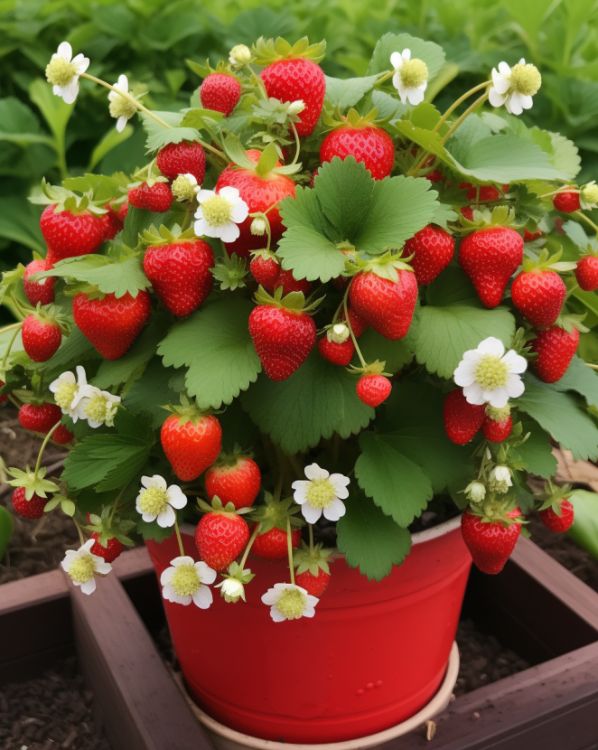
Step 1: Choose the Right Planter
Select a planter that is at least 12 inches deep to provide enough space for the strawberry plants' roots. Ensure that the planter has drainage holes to prevent waterlogging.
Step 2: Choose the Right Strawberry Variety
There are different types of strawberry plants available, so choose a variety that suits your climate and growing conditions. Some popular varieties include June-bearing, everbearing, and day-neutral strawberries.
Step 3: Prepare the Soil
Use a well-draining potting mix or a combination of garden soil and compost. Ensure that the soil is loose and friable to allow proper root development. Avoid using heavy clay soil, as it can retain too much moisture.
Step 4: Plant the Strawberries
Place the planter in a sunny location that receives at least 6 hours of direct sunlight per day. Fill the planter with soil, leaving about 1 inch of space below the rim. Space the strawberry plants about 12 inches apart, allowing enough room for growth. Make sure the crowns (the area where the leaves meet the roots) are level with the soil surface.
Step 5: Water the Plants
After planting, water the strawberry plants thoroughly. Ensure that the soil is evenly moist, but not waterlogged. Water regularly, especially during dry periods, and avoid overhead watering to prevent diseases.
Step 6: Provide Nutrients
Strawberries are heavy feeders, so they require regular fertilization. Use a balanced, slow-release fertilizer or apply a liquid fertilizer every two to three weeks, following the manufacturer's instructions. This will help promote healthy growth and fruit production.
Step 7: Mulch the Plants
Apply a layer of straw or mulch around the strawberry plants to suppress weed growth, retain moisture, and protect the fruit from direct contact with the soil. Spread the mulch evenly, making sure to keep it away from the crowns.
Step 8: Monitor for Pests and Diseases
Regularly inspect your strawberry plants for signs of pests or diseases, such as aphids, slugs, or fungal infections. If you notice any issues, take appropriate measures to control them, such as using organic pest control methods or consulting with a local garden center for advice.
Step 9: Pollination
Most strawberry varieties are self-pollinating, but to ensure better fruit set, you can gently brush a soft-bristled brush or your finger against the flowers to transfer pollen between plants.
Step 10: Harvest the Strawberries
As the strawberries ripen, they will turn fully red and become sweet and juicy. Harvest them when they are fully ripe by gently plucking them from the plants, taking care not to damage the fragile fruit. Enjoy your homegrown strawberries!
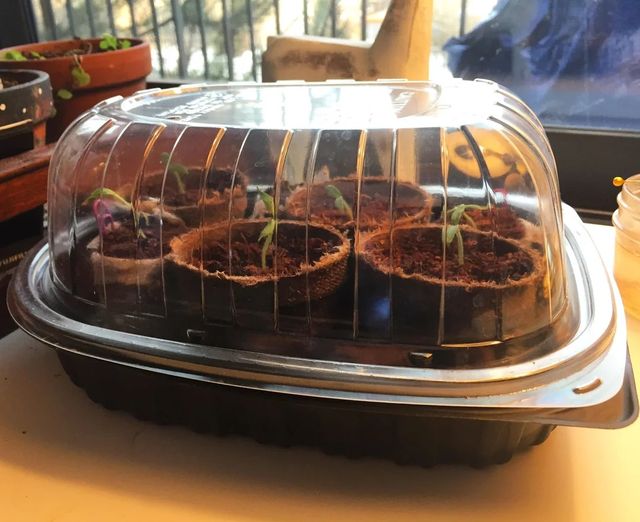
Upcycling tip:
A leftover rotisserie chicken container makes a great mini greenhouse!
DIG INTO CONTAINER GARDENING!
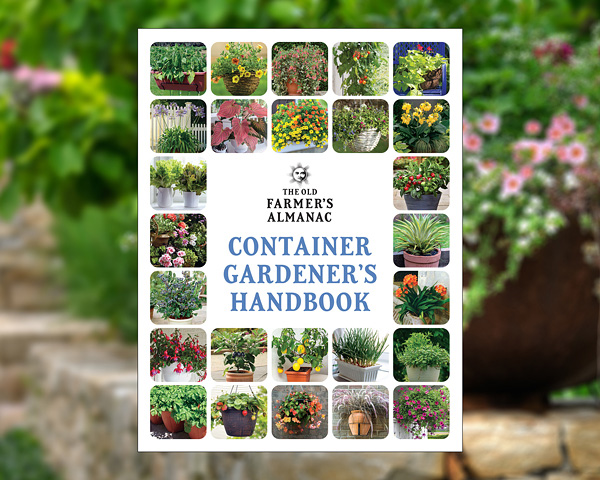
Short on space, time, or money or just want to garden in a new way? Container gardening helps you to explore your love of plants as well as “grow” your green thumb knowledge.
Inside this guide to gardening in containers, you’ll find . . .
-
Specific advice for growing miniature, bush, and other small-space vegetables, as well as herbs and fruit
-
Profiles of singularly sensational ornamental plants
-
Profiles of “thriller,” “spiller,” and “filler” plants, plus how to arrange them based on colors, textures, shapes, and more
-
Help in choosing proper containers, with tips on how to clean both pots and tools
-
The most desirable growing medium, how to make your own optimum mix, and how much you’ll need
-
Advice on providing sun, water, and fertilizer, plus what to do if you’ve overdone it
-
How to deter diseases and pests (and eliminate them if
need be!) -
Pages for recording your experiences and observations
-
Helpful anecdotes from fellow gardeners
-
Much, much more!
Perfect for brand-new and experienced gardeners alike, The Old Farmer’s Almanac Container Gardener’s Handbook (companion to the Vegetable Gardener’s Handbook and Flower Gardener’s Handbook) promises bountiful harvests and captivatingly colorful arrangements in pots—the ultimate small-space gardens.
(order your copy - click here)

